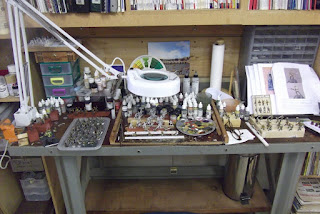
You might be excused for thinking that nothing much has been happening here at Digger's Home over the past few months. I've actually been intensely busy preparing terrain, figs and a scenario for the forthcoming Kingdom Con to be held here in San Diego, 13-15 April. I'll be doing a late-War scenario involving Anglo-Australian attack on outlying positions of the Hindenberg Line. I've probably painted more miniatures in the last two months than I have in the past five years. So for anyone wondering how to get back in the saddle, I'd say a combination of going public with your plans through something like a Blog, and the prospect of having to deliver at a club game or convention, can really produce palpable results. My painting table is littered with over 100 figures, now almost completed and ready for basing.
To take a break from the painting and also to maximize the playing area for the forthcoming game, I decided to create three more terrain squares. That would give me a playing area of 6ft x 8ft all together. I also wanted to construct a pill-box bunker insert for one of the pieces of terrain I'd made earlier this year.
The three new terrain squares were a breeze after working on the trenches. I designed them to be very simple, with few features apart from craters.
The pill box was designed to fit into a "blank" square I'd already cut in one of the terrain squares I'd made earlier on. I used a combination of expanded and extruded styrofoam and plastic card. The card was cut to shape to be inserted inside the excavated base of the bunker. The walls were made with white styrofoam I'd saved up from collected packaging. I wanted to be able to place both 25mm and 28mm figs inside so I made the bunker unnaturally deep to accomodate miniatures holding rifles upright and the like. The roof was made of blue styrofoam, carved to simulate bomb damage. I did a dry run first to make sure all the pices fitted snugly, and then used a styrofoam-friendly glue to fit them in place.
I did all this outside this time as I didn't want the debris from the terrain making to get on my already completed terrain squares not to mention the masses of figures on my painting table.
Using a similar method to that which I'd employed for the terrain squares, I coated the piece with elastomeric roof coating to seal it, then while this was still wet, I applied a texture with sand and gravel. Once that had dried, I painted and detailed the concrete, surrounding earth, and access trench. I also inclded some sandbags and a small section of barbed wire. All in all I was pretty pleased with the result. We'll see how it goes on the table during the con.


Excellent work...great looking trenches
ReplyDeleteI like it! Reminds me that I need to get back to my WWI Marines
ReplyDeleteNice work!
ReplyDeleteChristopher
Beautiful work! I've really enjoyed looking at all your posts regarding the creation of this fabulous table. Bravo! I'm just about to embark on a WWI project and your efforts give me great inspiration - thank you!
ReplyDeleteCurt
I think it will apal tarwa( Japan ) beach bunkers?
ReplyDeleteScratch Cards