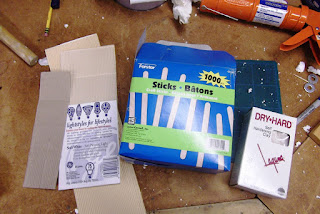
For the corrugated iron that was sometimes employed to line the walls of trenches I've used the packaging from light bulbs and florescent tubes. This is really easy to work with and is just the right scale for 25-28mm gaming. I cut the cardboard into sections and then paste it onto the sides of the trenches, sometimes overlapping the pieces. Initially I used a wood glue, but found that the cardboard began to bow slightly, so I switched to a combination of wood glue and cyanoacrylate, using a spray on accelerator to tack the pieces in place. With the Styrofoam base sealed with the elastomeric roof coating there is no chance of the superglue eating into it.


I also worked on fabricating sandbags using some self-hardening modeling clay. My initial efforts produced bags that were way too big for the scale I was aiming for. I checked out a few web pages with advice on how to make them and came up with a more consistent method. I worked the clay into long rounded "strings" and then cut it up at regular intervals. I molded the edges of the bags with my fingers and then piled them on top of each other beginning at the bottom of the firing step. Once I'd produced something resembling a wall, I pressed the bags into the base a little more tightly, hoping the pressure would seal them together. Once they had hardened slightly I got a piece of cheesecloth and gently pressed it over the surface of the clay to try and create an appropriate texture.

There are a few things I'd probably do differently next time. I had measured and cut the firing step, and indeed the entire front line trench to accommodate standard base sizes. I hadn't taken into account the width of the sandbags. There's still enough space to mount figures comfortably on the steps, but next time I would probably make sure the steps were wider. I noticed once the sandbags were in place and dry they tend to move around a little. In other words they have not adhered well to each other. I'll use a watered down solution of scenic cement to wash over the wall and hopefully this will seal the bags in place. With the next wall, I'll work on lining the bags up better and getting a more uniform feel to the wall.

The other type of trench reinforcement I've used is to model the wooden retaining walls employing a combination of pre-cut basswood strips and rounded toothpicks. I lined up a series of the strips on a horizontal surface and then ran a bead of wood glue over them. You can manufacture a number of sections at a time. When the glue is fairly dry, the wall can be erected with the glued side next to the molded contours of the trench wall itself. Glue the prefabricated walls in place and then glue vertical braces on the sides facing the interior of the trench. I used rounded toothpicks for the interior braces just for variety. This method produces walls with boards scaled accurately to the figures on the battlefield. However it also uses up a lot of pre-cut strips. I'm going to experiment with cutting thin balsawood strips and bristol board to see how that looks too. The next step will be to prefabricate duckboards for the trenches.


